
Unless it’s cowboy coffee, coffee tends be brewed through some sort of filter. The fun part is there is more than one way to do it that allow for recipes, alteration in flavour and preference, or pairs with a specific roast. With so many ways to brew, filter coffee can be split into two types; immersion brewing or percolation brewing.
Immersion
The mixing of coffee and water, leaving the coffee to brew and then choosing when to extract according to recipe, experiment, or whatever you fancy, it comes down to you. Examples of immersion include the French Press, Aeropress, Clever Dripper, and the Siphon. Brew time comes to be a key element in immersion brewing over how you pour, making it quite forgiving. Cupping is also considered an immersive brewing method where each stage of the extraction is tasted and evaluated, the other devices use a filter and human pressure that forces coffee through the filter, whether metal or paper. Timed release is another factor of immersive brewing, such as the Clever which can double as a pour over or be left to brew internally.
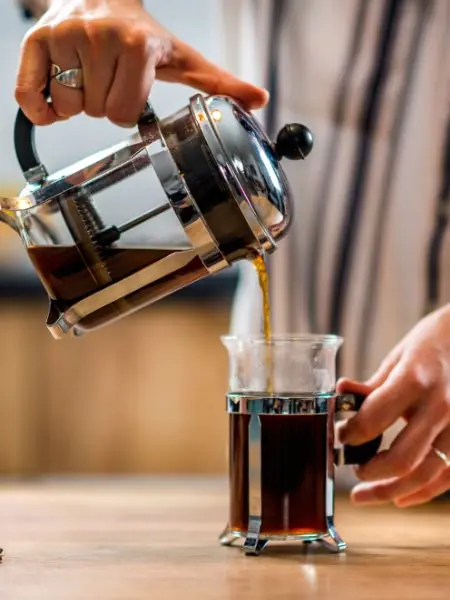
The benefits of using immersion is it’s simple, there’s less monitoring involved, and stays rather consistent once you find what works for you. This could be why the French Press is typically the most common ‘next step’ in home brewing. It’s rather affordable, simplistic, and low maintenance as long as it’s kept clean. Leaving coffee immersed in water makes for a bolder and rich cup of coffee, making it great for highlighting darker flavour or base tasting notes. Happen to over extract or find the cup a bit on the heavier side? The bypassing method (which just means pouring water into the coffee, therefore bypassing the brewer/filter to dilute the cup) can be used which then means you don’t need to nail it every-time. Perfect for quick mornings or an intro to home brewing.
I do have one suggestion when it comes to using a French Press, because I personally have found that it’s a method I come to avoid because of my preference in lighter and more complex tastes. The French press has had a bad rap for making either really oily or bitter coffee. A quick fix for this and utilizing the device for the best possible flavour is simply to decant your brew once pressed, and again, keeping the metal components clean. This may not be earth shattering or even news, but if the grounds are left in the press with the water, it continues to brew and over extract, sort of like leaving in a green tea bag in for too long. The mouth-feel becomes drier, bitter, and misses the sweet spot. As for keeping it clean, again not really exciting news, but there’s been a common myth I’ve come across where it’s believed that leaving old grounds in the brewer of choice will keep adding that “coffee taste” or really season the brewer. What ends up happening is you’ll stop tasting the fresh coffee being brewed each time, and combine it with that drier and bland old coffee oils.
Percolation

Instead of mixing, water is poured over the grounds and the brew is left with gravity to bring the water through the bed of grounds. Examples of this include the V60, Kalita, Chemex, batch brewers, and the Clever Dripper once again when it’s placed over your choice of decanter during the brewing process. The manual devices are known as, you may have guessed, pour-overs and allows for water to extract coffee at it’s own pace according to the recipe. The name ‘pour-over’ does not apply to batch brewers because it is not manually done pouring by hand.

Benefits of percolation is it addresses the delicate flavours and aromas, or the higher tasting notes in a coffee. I am a little biased in the area as my go-to coffee tends to be a bit on the stranger or experimental side which you can really play with in pour over coffee. Which leads me into the fact that each device brings a different level of play on the extraction and flavour highlights. For example, the Chemex uses a thicker paper filter, which holds a lot more of the coffee’s oils in the coffee rather than incorporated into the brew (mind you, oils are definitely not a bad thing in coffee), and presents a very crisp, apparent, and light taste, really highlighting fruit, florals, and honey sweetness. Something like the Kalita has a flat bottom and three small exit holes rather than one large one, reducing the rate of flow and suspending the coffee a bit longer, but all while still highlighting those lighter notes just with a deeper body or thicker sweetness.
The constant flow is pretty efficient for extraction which means you may not need as much coffee as you would for an immersion. That and these devices tend to be super quick and easy clean up. What may deter some from a percolation preference is the brew really relies on the accuracy of your pour and temperature stability which makes consistency a little more challenging. It’s all in situational preference! I like the necessary attention it takes to make a good cup of coffee because it means I shouldn’t really be multitasking and it forces me to take a moment, now maybe a little too philosophical to be incorporated with making your morning brew, but I’ve been side tracked and left my Clever to over extract too many a time to know where my preference stands! (That and I find my preference in blueberry tasting notes and delicate Ethiopian coffees works amazingly in pour-overs).
Immersion V.S. Percolation, whether you’re looking for that bolder deeper flavour with a fuller body, or a lighter body and pleasant acidity, there’s a brew device for it. A mix of both? That can be done as well depending on techniques borrowed from each method in a device. So, there may be a recommended way to brew your coffee to acquire said tasting notes, but it’s ultimately down to how you best enjoy your coffee!
Connect
Instagram: @devils_head_coffee
Facebook: @Devil’s Head Coffee
Email: [email protected]
Fuel Your Next Adventure
Shop Our Featured Beans
Single Origin
Peru
Cocoa, caramel and chocolate
Custom Blends
Alberta Jam
Chocolate covered berries, ultra smooth, juicy and rich
Custom Blends
The Ghost
Superbly balanced, sweet espresso with flavors of hazelnut, sweet chocolate and apricot